
Developer App
Tour the Developer App interface — canvas controls, tools, publishing, and preferences
Developer App
The TelemetryOS Developer App is a desktop application for building and testing TelemetryOS applications locally. It provides a simulated device runtime with live preview, canvas controls for testing different screen sizes, and tools for publishing directly to the platform.
Installation
In Studio, open the Applications page and click Get Developer App.

Download the installer for your operating system (macOS, Windows, or Linux) and run it.
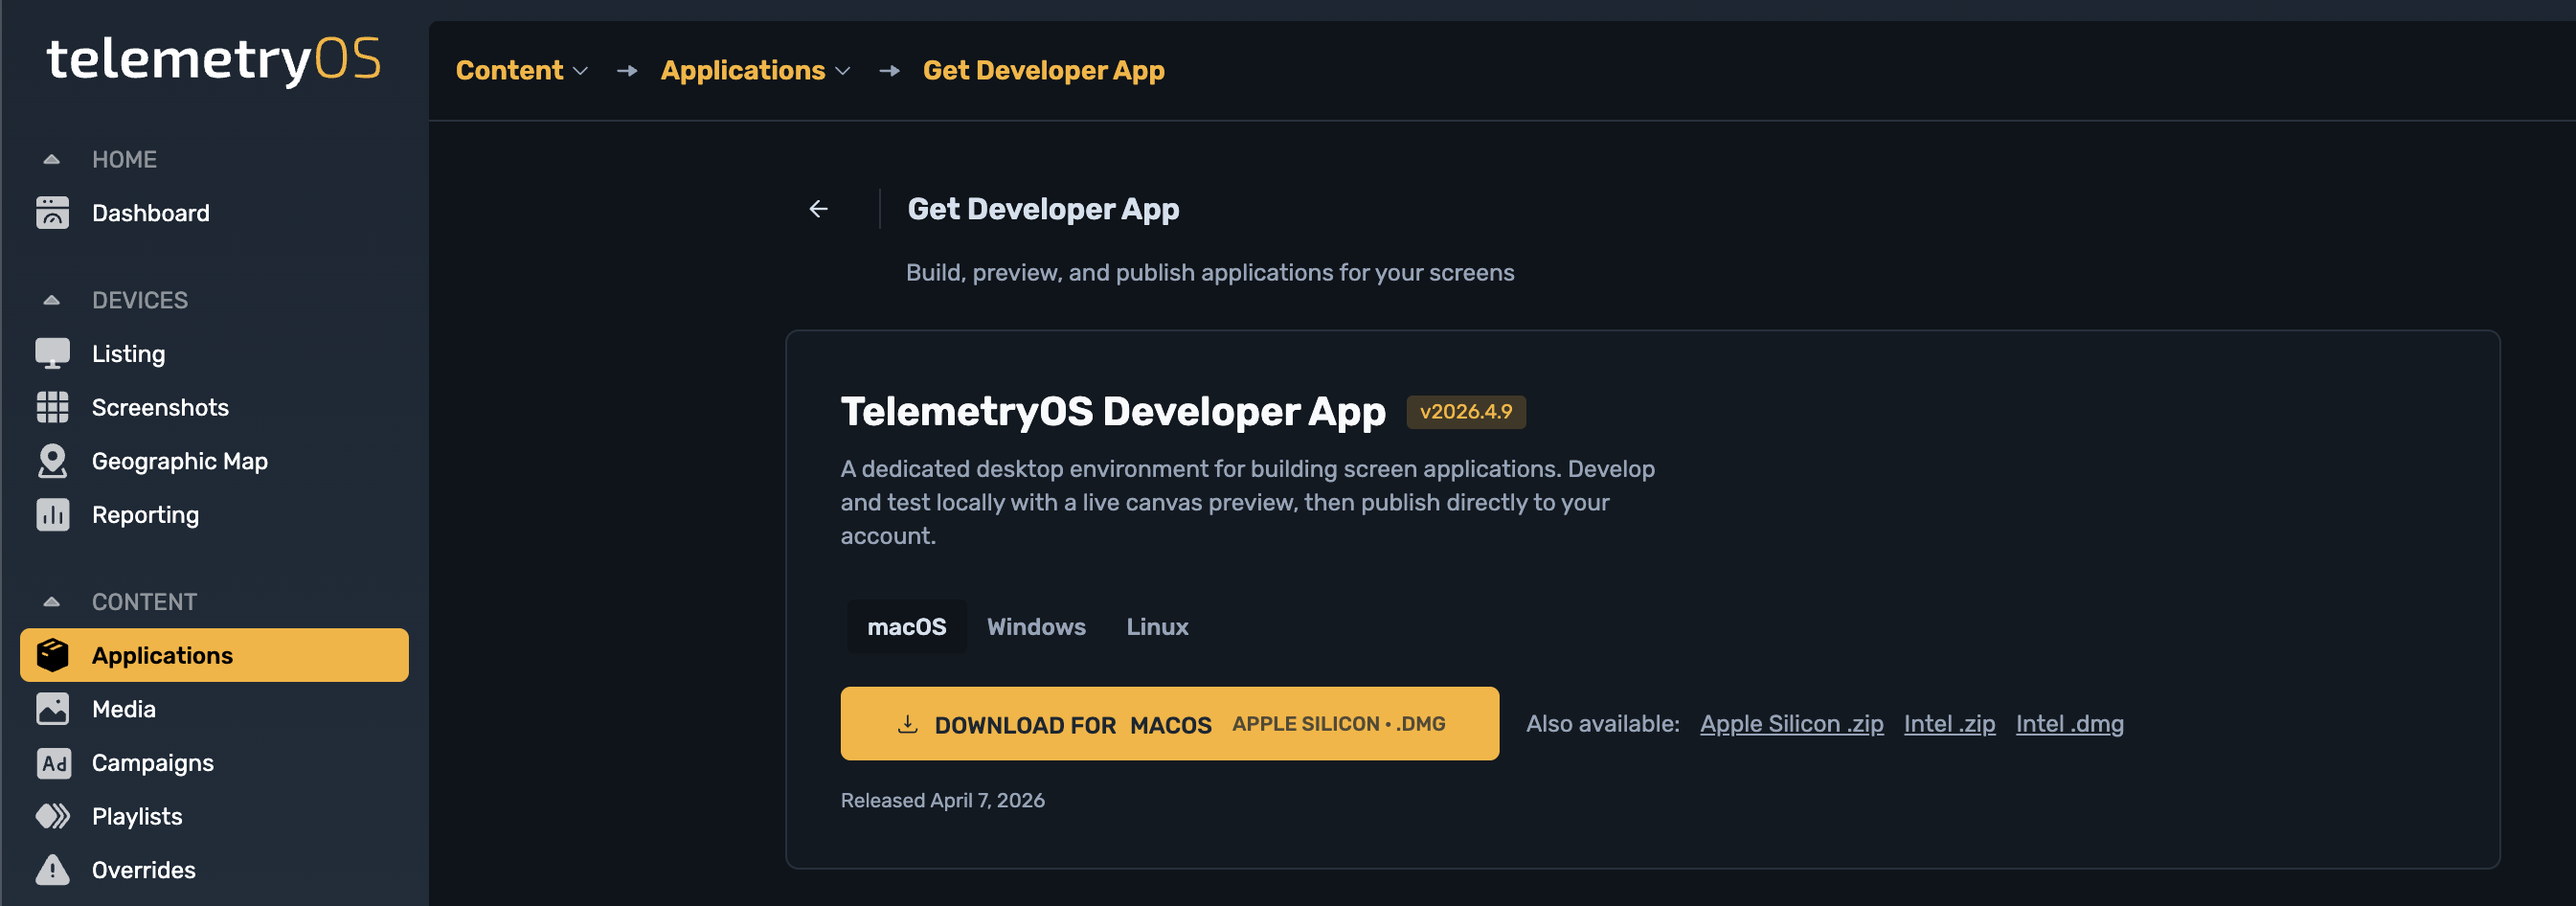
The Developer App bundles a managed Node.js runtime, so a separate Node.js installation is not required.
Welcome Screen
When you launch the Developer App with no project open, you see the Welcome Screen.
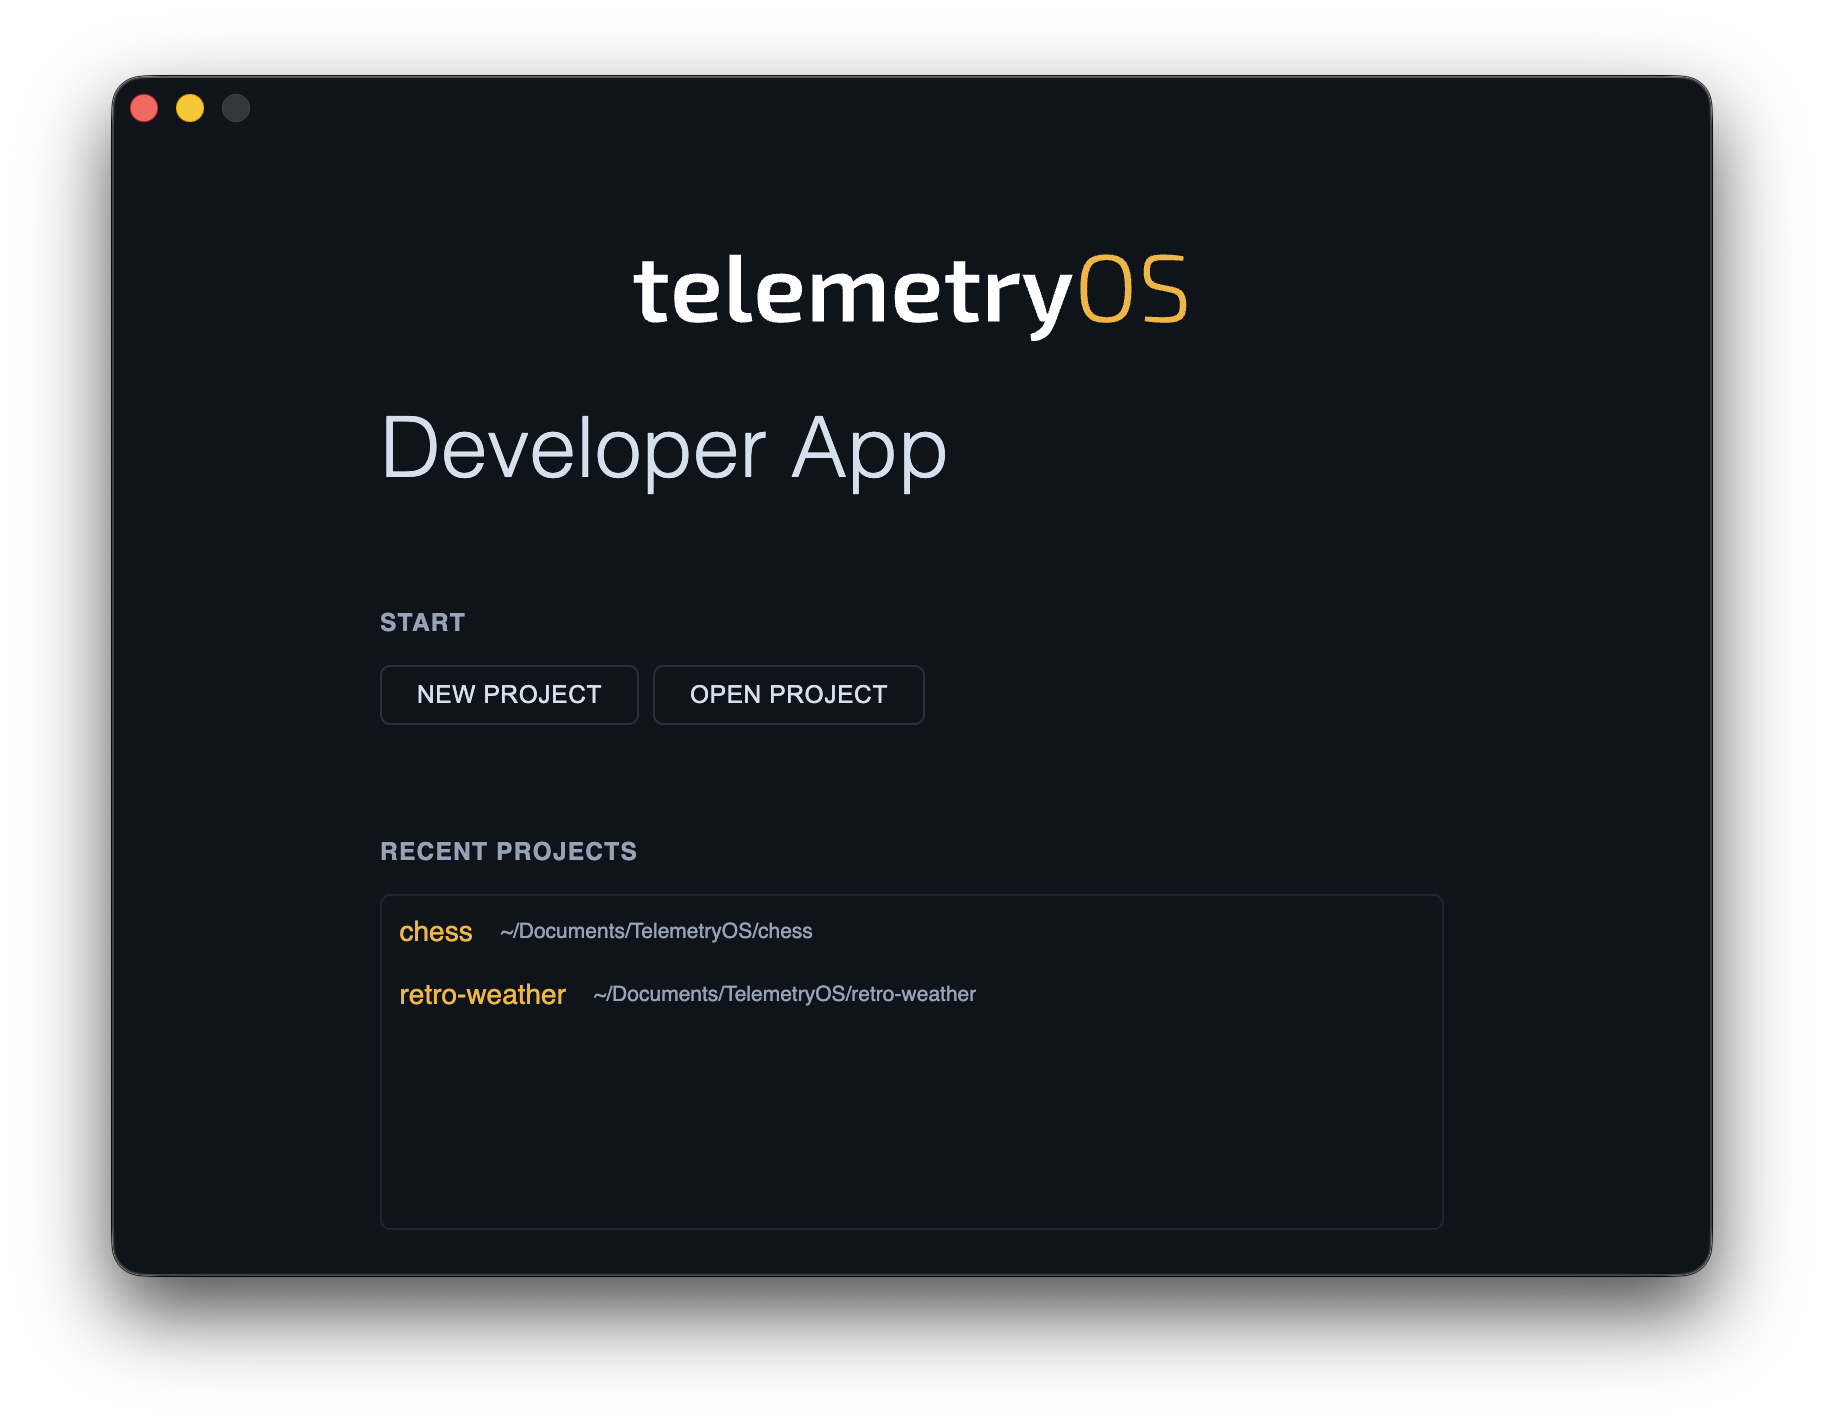
New Project opens a dialog where you name your project and choose a template.

Two templates are available:
- Render + Settings — the standard template with a display view and a configuration sidebar
- Render + Settings + Web — adds a browser-accessible web mount point for staff or public interfaces
Every generated project ships with pre-configured AI agent integration — .mcp.json pointing at the Developer App's MCP server, pre-approved Claude Code permissions in .claude/settings.local.json, and a CLAUDE.md project context file. Open the project directory in your AI coding tool and it connects automatically. See AI-Assisted Development for details.
Open Project lets you browse to an existing project directory. Recent Projects lists projects you have previously opened for quick access.
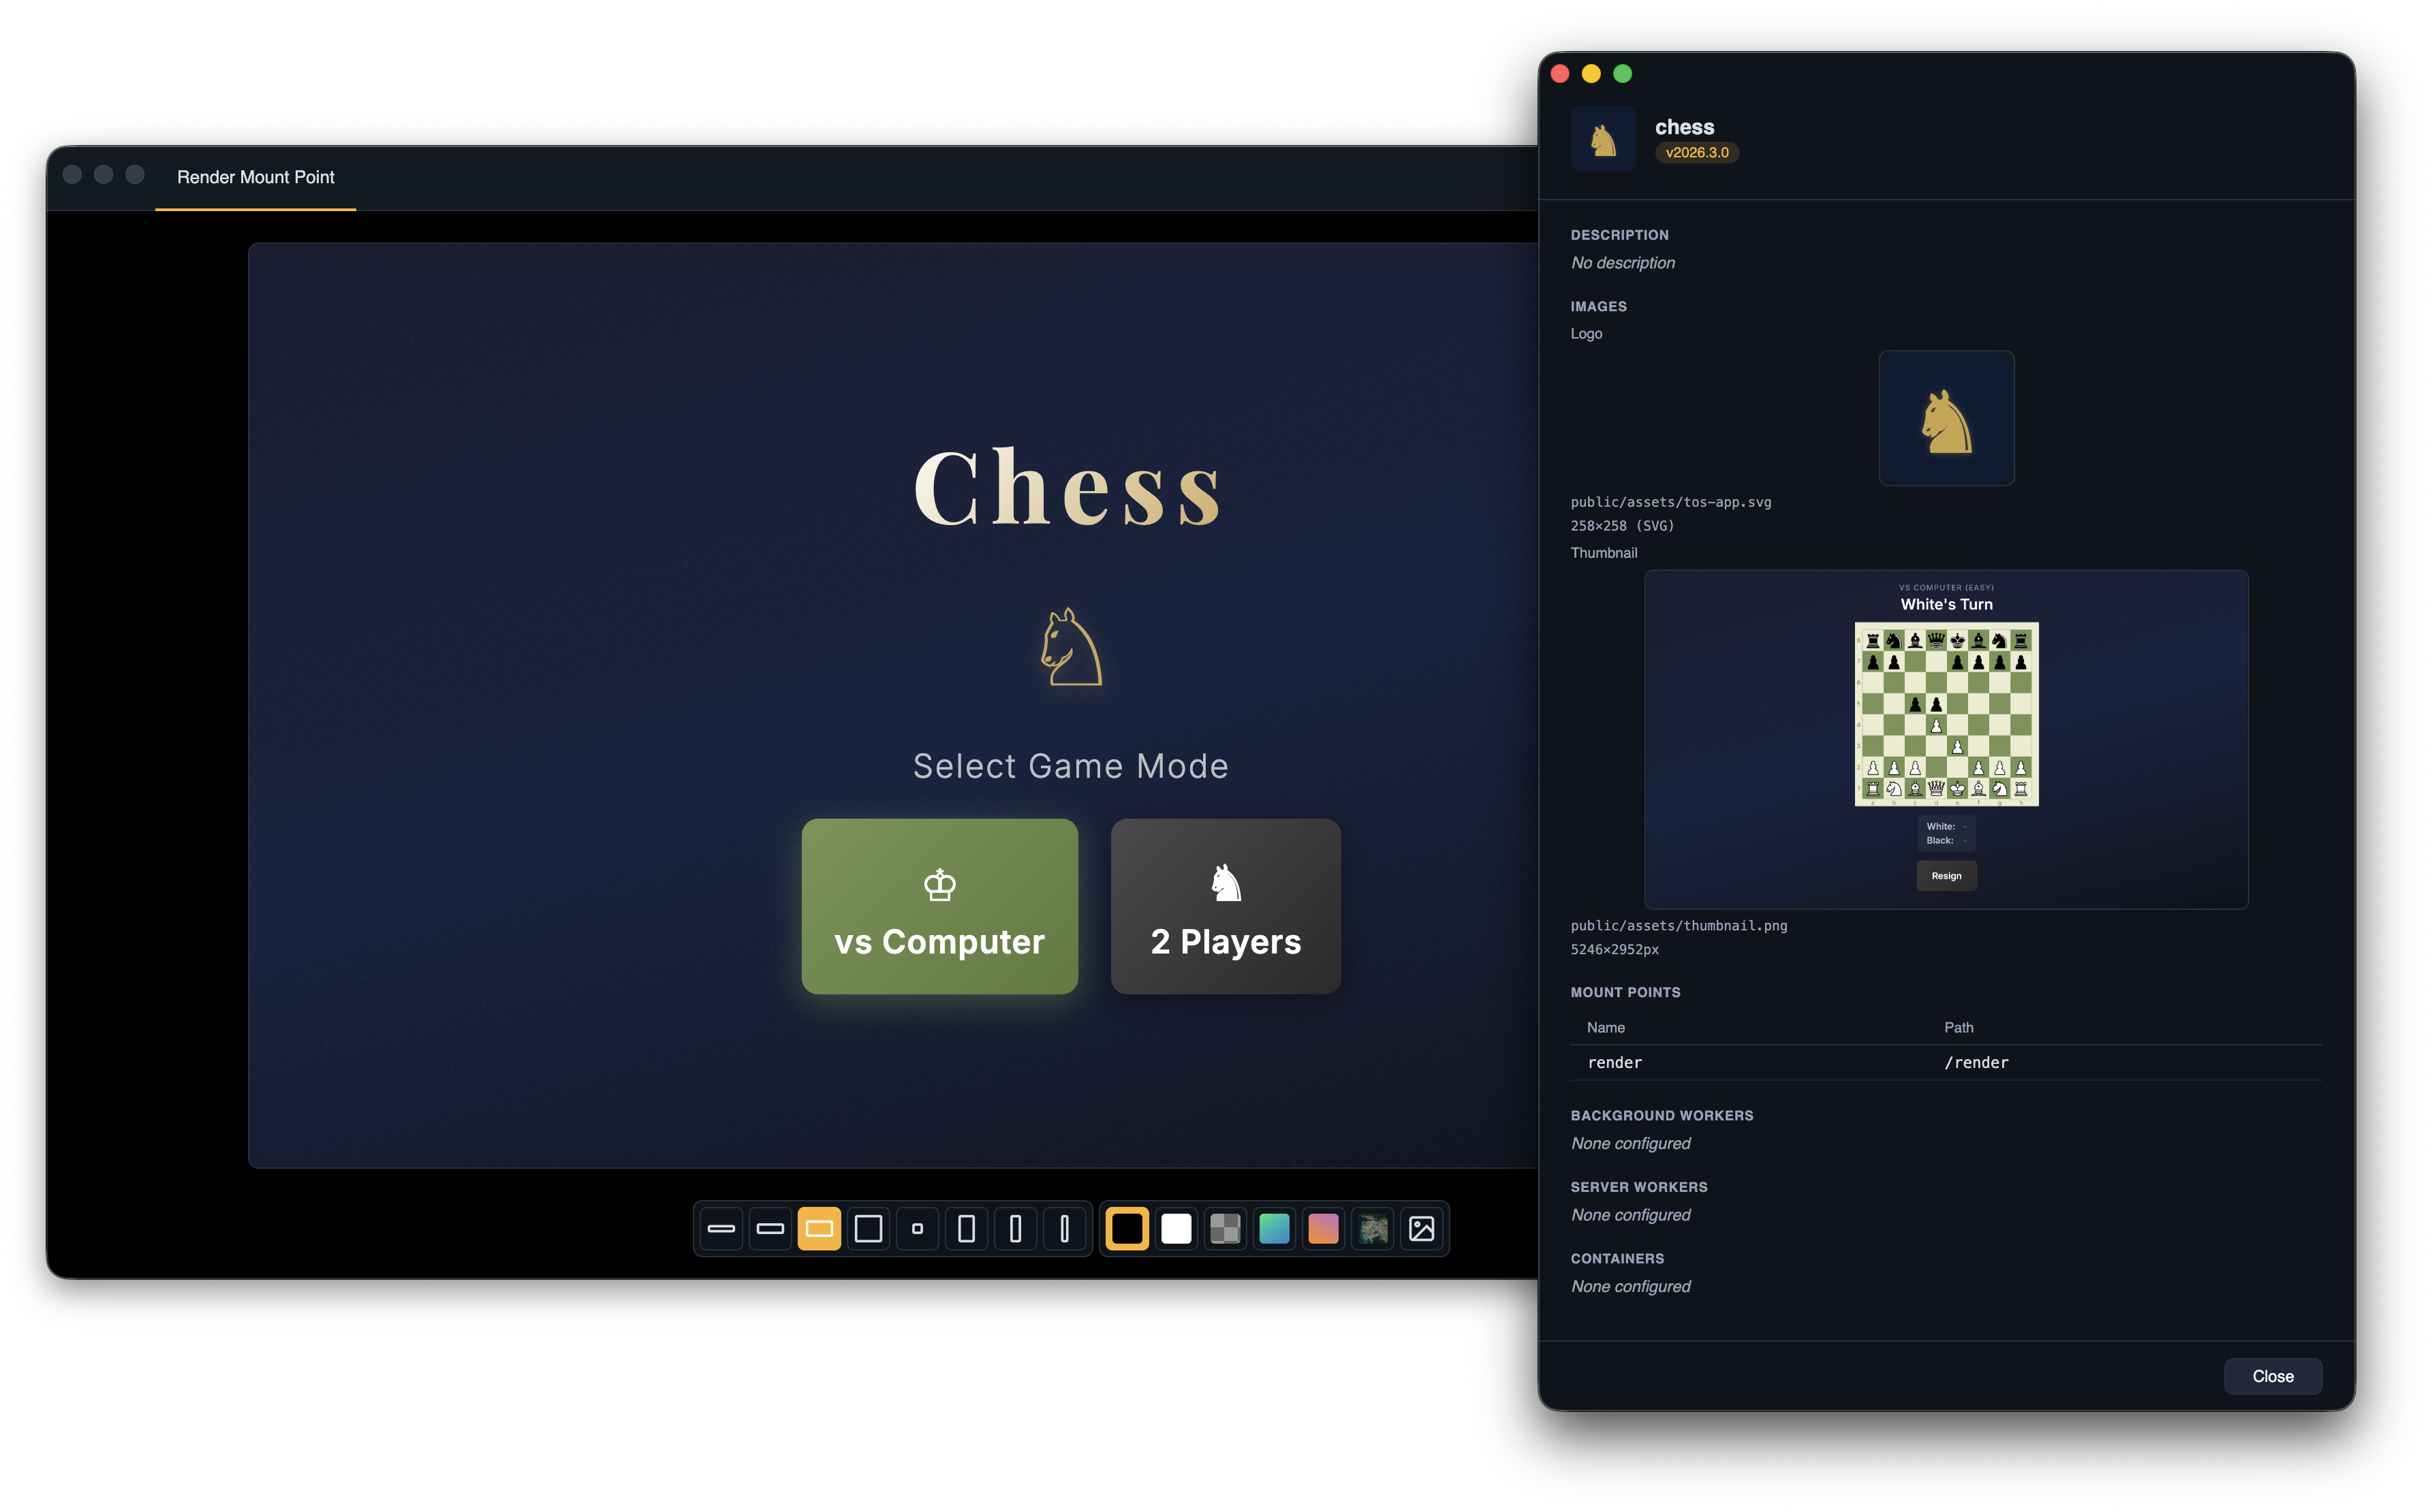
The Project Window
When a project opens, the Developer App starts its dev server and displays the project in a simulated TelemetryOS environment.
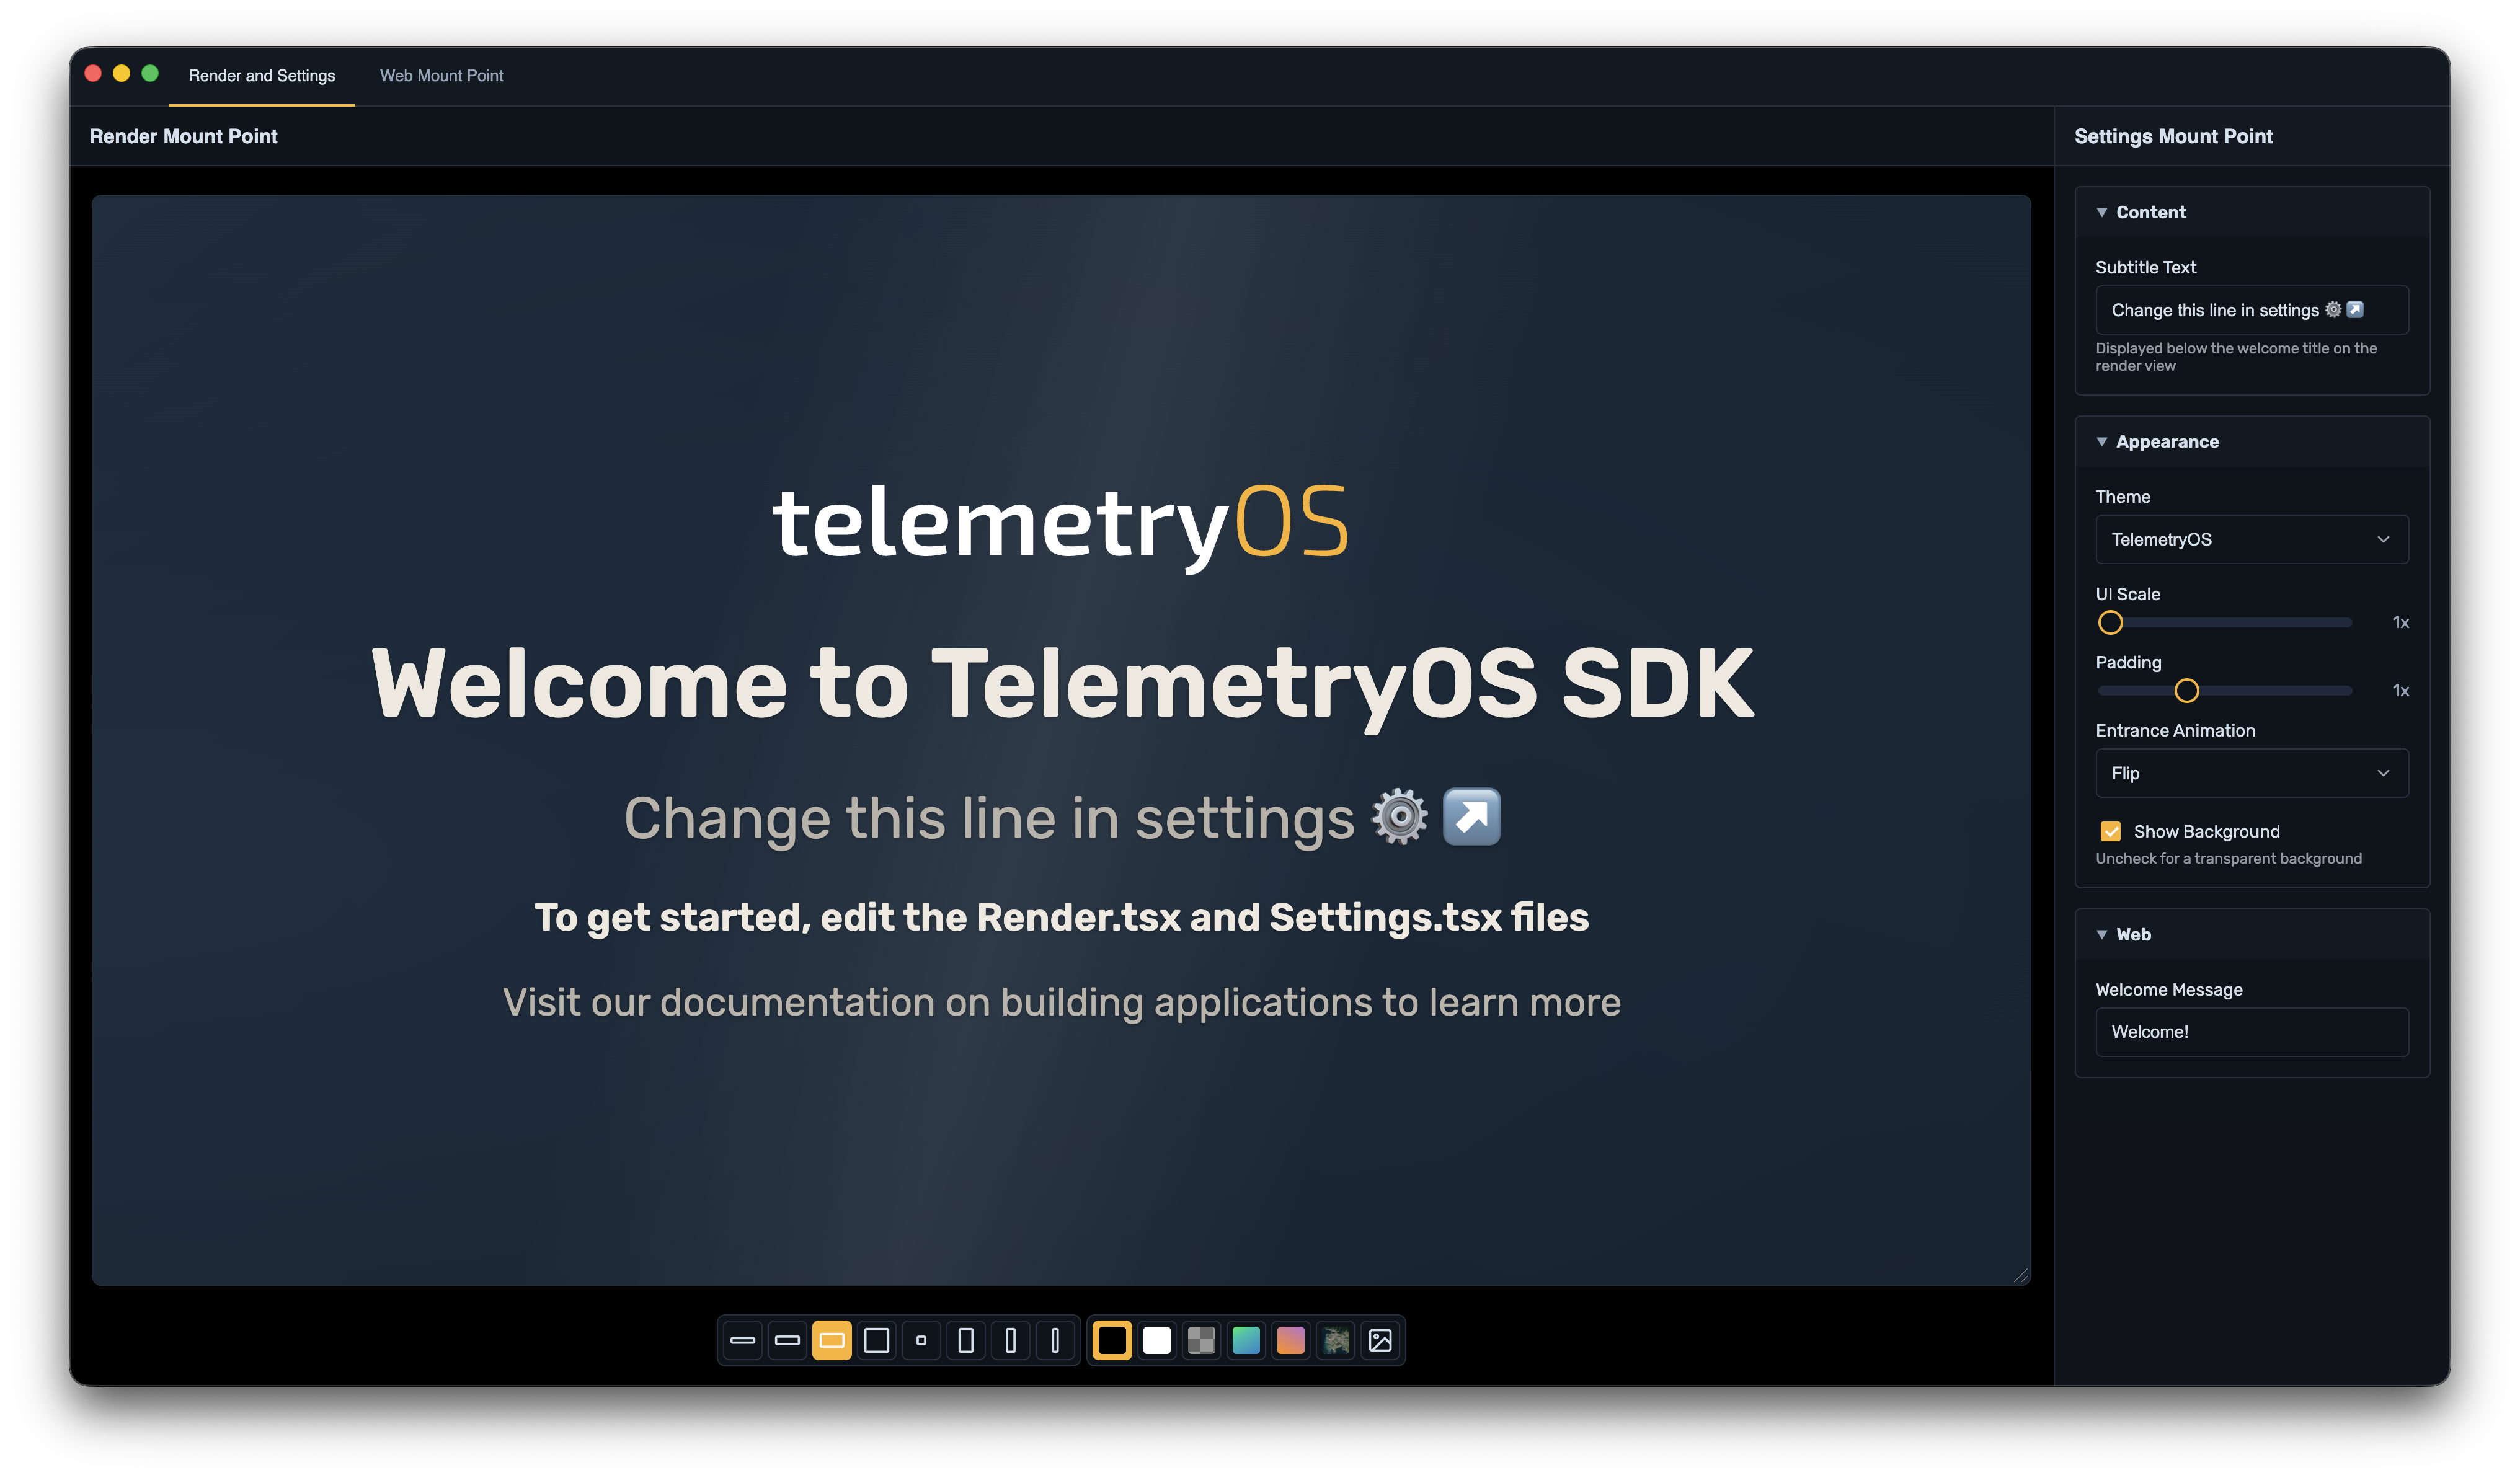
The window has three main areas:
- Canvas (center) — displays your render mount point in a resizable preview that simulates a device screen
- Settings sidebar (right) — displays your settings mount point, mirroring the configuration panel that administrators see in Studio
- Toolbar (bottom) — controls for switching aspect ratios and backgrounds
Storage writes from the settings view propagate to the render view in real time, just as they would on a deployed device. The tab bar at the top switches between the Render and Settings tab and the Web Mount Point tab (if your project has one).
Canvas Controls
The bottom toolbar lets you test how your application looks on different screen sizes and against different backgrounds.

Aspect ratio presets (left group) simulate common display form factors:
| Preset | Use case |
|---|---|
| 5:1 Chiron | Ultra-wide LED strips, ticker boards |
| 3:1 Landscape | Wide banner displays |
| 16:9 Landscape | Standard widescreen monitors and TVs |
| 1:1 Square | Square panel displays |
| 1:1 Small Square | Smaller square panels (renders at 33% scale) |
| 9:16 Portrait | Vertical signage, portrait monitors |
| 1:3 Portrait | Tall narrow displays |
| 1:5 Skyscraper | Ultra-tall displays, digital totems |
Cycle through presets with Cmd+] / Cmd+[ (Ctrl on Windows/Linux).
Background presets (right group) change the area behind the canvas. These help you check how your content looks in different contexts, since the actual background behind your application on a device depends on the playlist layout:
- Black / White — test contrast and edge visibility
- Checkerboard — check for unintended transparency
- Gradient / Sunset — simulate colorful surroundings
- Image — use a custom background image for realistic testing
Cycle through backgrounds with Cmd+Shift+] / Cmd+Shift+[.
Web Mount Point Tab
If your project defines a web mount point in telemetry.config.json, a Web Mount Point tab appears in the tab bar. This tab provides a browser-like view with an address bar for testing your web interface.
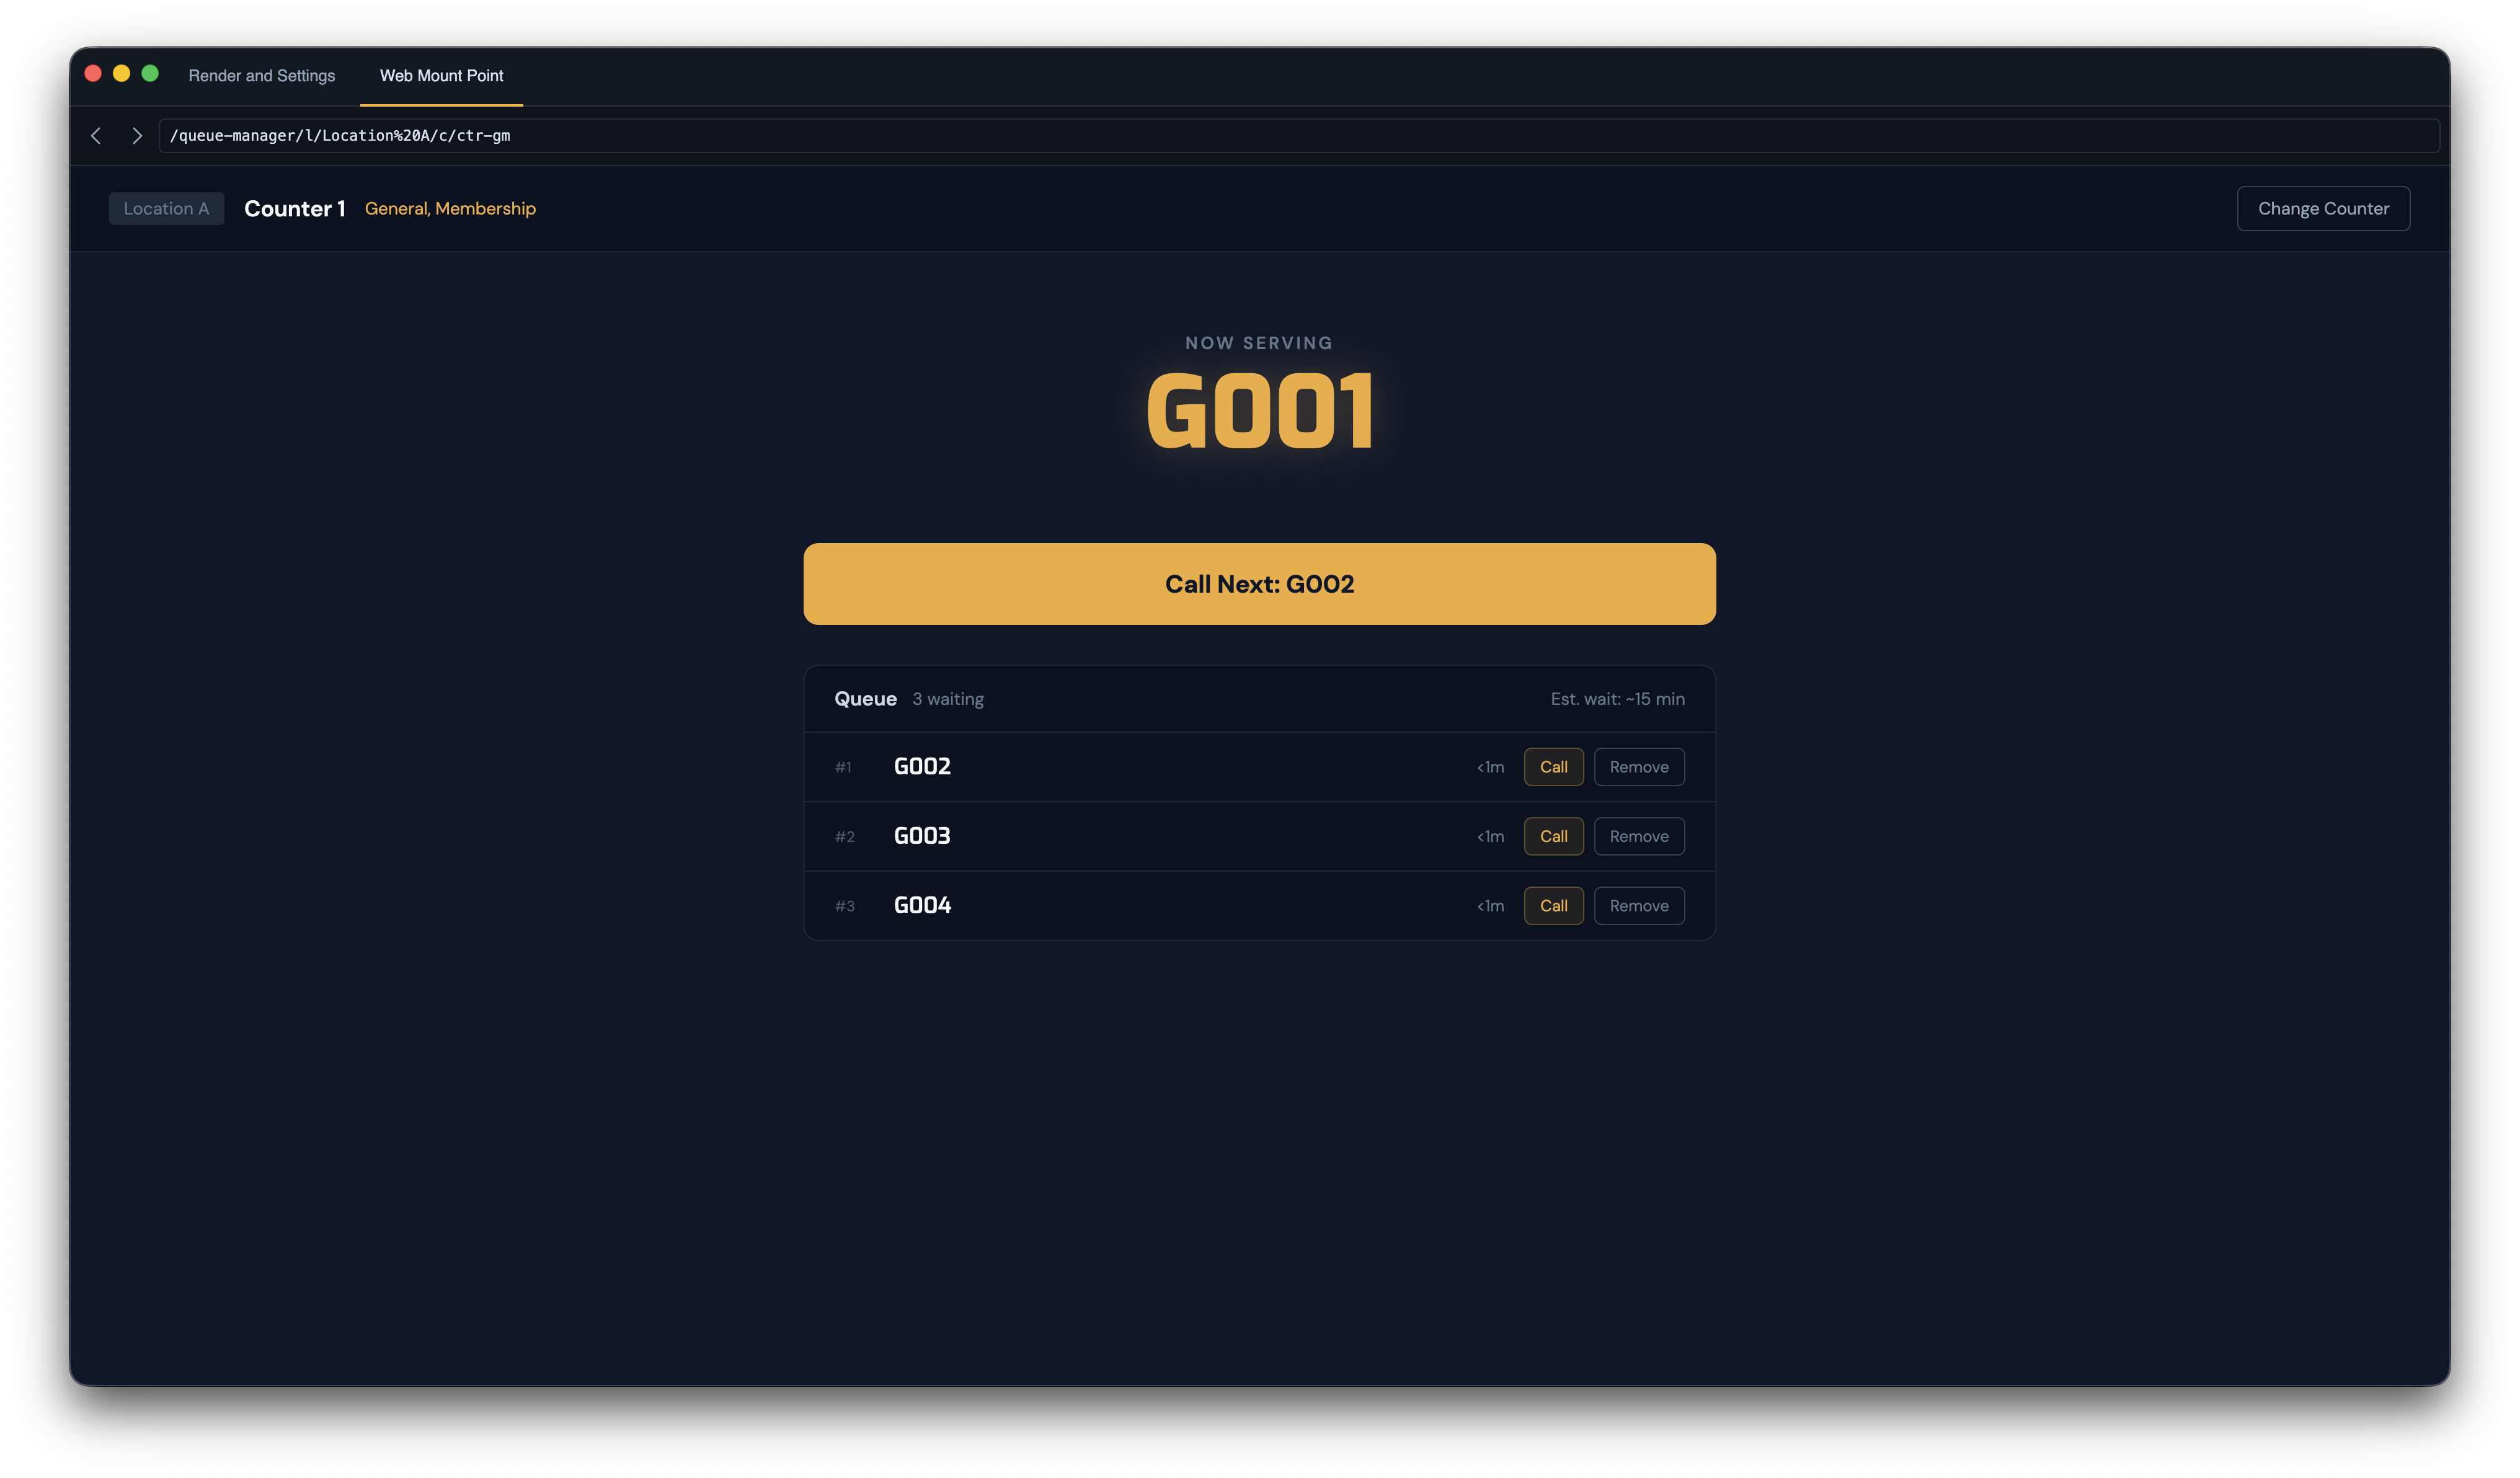
The address bar supports:
- Back / Forward buttons — navigate through page history
- Path input — type a path and press Enter to navigate directly (paths are automatically prefixed with
/)
Switch between tabs with Cmd+1 / Cmd+2 or Ctrl+Tab.
Tools
The Tools menu contains development utilities. Most of these are only available when a project is open.
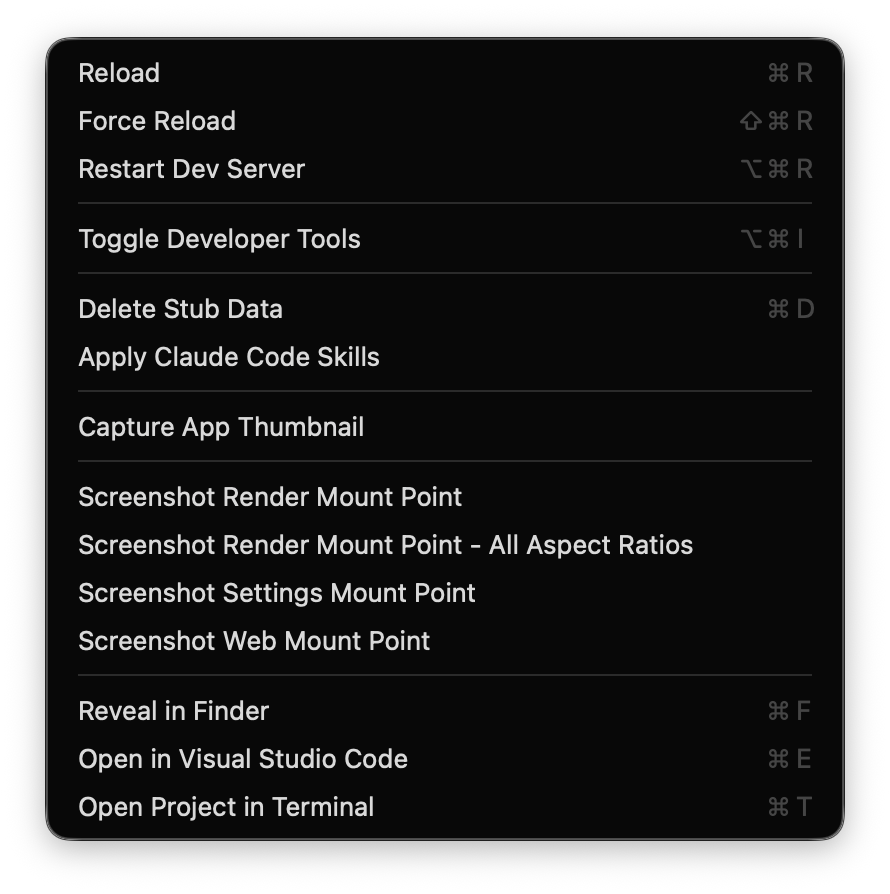
Delete Stub Data
During local development, the Developer App stores mock SDK data — storage values, media content, account information — as files in your project's .telemetryos/ directory. This data persists across dev server restarts so your application state survives while you work.
Delete Stub Data (Cmd+D) clears all of this persisted mock data, resetting your application to a clean first-run state. Use this when:
- Stale test data is causing unexpected behavior
- You want to test your application's first-run or empty-state experience
- You have changed your storage schema and want to start fresh
warning Deleting stub data removes all locally persisted mock storage, media, and account data. Your application will behave as if running for the first time.
Screenshots and Thumbnails
The Tools menu offers four screenshot options:
- Screenshot Render Mount Point — captures the render canvas at its current aspect ratio
- Screenshot Render Mount Point – All Aspect Ratios — captures one screenshot per preset (8 images total), useful for testing or marketing materials
- Screenshot Settings Mount Point — captures the settings sidebar
- Screenshot Web Mount Point — captures the web tab
Screenshots are saved as PNG files in your project directory.
Capture App Thumbnail is different from the screenshot options — it saves a 512×512 image used as your application's icon in Studio. Run this before publishing so your app has a recognizable thumbnail in the application registry.
Restart Dev Server
Restart Dev Server (Cmd+Alt+R) stops and restarts the underlying dev server process. Use this when hot module replacement stops working or when you need to pick up configuration changes that require a full server restart.
External Tools
- Reveal in Finder / Explorer (Cmd+F) — opens your project directory in the file manager
- Open in Editor (Cmd+E) — opens the project in your preferred code editor (configurable in Preferences)
- Open Project in Terminal (Cmd+T) — opens a terminal session in the project directory
App Info
App Info (Cmd+I) displays a read-only summary of your project's telemetry.config.json: name, version, logo, thumbnail, configured mount points, background workers, and containers.
Version and Archive
TelemetryOS applications use calendar versioning (CalVer) in the format YYYY.MM.PATCH (for example, 2026.04.1).
- Bump Version (Cmd+Shift+V) — increments the patch number
- Archive (Cmd+Shift+A) — bumps the version and creates a
.tar.gzfile for manual upload or CI pipelines
Archive has a "without Version Bump" variant (hold Alt) when you want to re-export the current version.
Preferences
Open Preferences with Cmd+, to configure:
- Appearance — light, dark, or system color scheme
- Default editor — which code editor "Open in Editor" launches
- Reopen projects on launch — restore your previous session automatically
Keyboard Shortcuts
| Action | macOS | Windows / Linux |
|---|---|---|
| New Project | Cmd+N | Ctrl+N |
| Open Project | Cmd+O | Ctrl+O |
| App Info | Cmd+I | Ctrl+I |
| Bump Version | Cmd+Shift+V | Ctrl+Shift+V |
| Archive | Cmd+Shift+A | Ctrl+Shift+A |
| Next Aspect Ratio | Cmd+] | Ctrl+] |
| Previous Aspect Ratio | Cmd+[ | Ctrl+[ |
| Next Background | Cmd+Shift+] | Ctrl+Shift+] |
| Previous Background | Cmd+Shift+[ | Ctrl+Shift+[ |
| Tab 1 (Render and Settings) | Cmd+1 | Ctrl+1 |
| Tab 2 (Web Mount Point) | Cmd+2 | Ctrl+2 |
| Next Tab | Ctrl+Tab | Ctrl+Tab |
| Previous Tab | Ctrl+Shift+Tab | Ctrl+Shift+Tab |
| Restart Dev Server | Cmd+Alt+R | Ctrl+Alt+R |
| Delete Stub Data | Cmd+D | Ctrl+D |
| Reveal in Finder / Explorer | Cmd+F | Ctrl+F |
| Open in Editor | Cmd+E | Ctrl+E |
| Open in Terminal | Cmd+T | Ctrl+T |
| Preferences | Cmd+, | Ctrl+, |
Next Steps
- Project Structure — understand the files and directories in a TelemetryOS project
- Local Development — CLI commands, mock SDK behavior, troubleshooting, and testing patterns
- Configuration — configure
telemetry.config.json